Slider

Crocheting: Beginner Slippers Great for the Polar Vortex

Tuesday, January 7, 2014

The other evening, I was hanging out with my cousins and we were having a good laugh at my crocheting endeavors. (Hi Michelle in Japan! Remember that MNI you hosted and I couldn’t even make a circle?!?) I’m pretty good with scarves and bulky yarn, but that’s like saying you can draw a straight line with a ruler. At the time, I was wearing my new slippers from Beanies By Stacie and my cousin liked them. I told her that I would gift them to her if she would make me a replacement pair. She smiled and we made a deal. Then we started to talk about youtube and how you can learn so much there. Especially because you can pause, rewind, and start over. DUH!

I found myself with a bit of time the next evening and happened upon this gem by someone named Emi! The next day, we had some time before my Beloved had to go to work. We found ourselves at JoAnn’s picking out yarn, using a coupon, hurrying home to make some. I discovered, I needed his foot when I made it (because I didn’t measure it), so I made a pair for myself. I watched a movie and had one slipper completed. I put on a second movie to complete the 2nd slipper.  You can see that the right one is my “learner” slipper. It is looser on my feet than the one on the left. But they still work and are quite warm.


I’ve since whipped up a single slipper for my Beloved and my eldest (who wanted a pair with my yarn). I hope to finish those as I have time this week.

I used one skein of yarn for my pair (size 9 womens) and should have enough to finish up the Sugarbean’s (size 11 kids). I will go through 1 skein for my Beloved’s (size 12 mens). If you want to make baby booties, I highly recommend this video by Emi, as well!

Battleshots–Something to get ready for St. Patrick’s Day

Friday, March 16, 2012

This post will first come with a warning! As with anything be responsible and drink responsibly. Always have a designated driver!

Ok, now that’s been said, battleshots, that’s right. Many of you may have grown up playing the popular game Battleship. If you were fancy, then maybe you had an electronic version of the game. My friend and I were talking about the after party to the birthday party and well, thanks to Pinterest, she said she would come up with our very own set of Battleshots! This is what she used

  • 2 unused pizza boxes
  • Grid Paper (7 columns by 7 rows) – several sheets
  • Markers for the ones that have been chosen (so you can re-use your battleshot set, we used plastic coins)
  • Shot glasses
  • 2 pens – to mark the grids of where you’ve chosen
  • Libation of choice*

She procured everything! Printed off several grid sheets and then she made festive shot glasses using stickers featuring characters from Pirates of the Caribbean. And because she never does things halfway, she also cut out dowel rods with flags and the ol’ Jolly Roger for further enjoyment. Look how pretty our game is!

Our ships were:

  • 4 shots
  • 3 shots
  • 2 shots
  • and the maelstrom (which started out as a brownie for us and later turned into everyone on that side of the table had to take a shot)

*tips…

  1. I would strongly encourage you to not use American Honey or Tequila as your drink of choice. Stick with beer, champagne, or sparking water. Your liver will thank you later.
  2. If you plan on using your game many times, then try to waterproof your base using clear Contact paper or thin clear sheeting.
  3. Definitely have more than 1 player per team. You can play one-on-one, but it is so much more fun to play larger teams.
  4. Beware of the maelstrom. This guy got us all! Luckily, we started off with forcing everyone to eat a brownie.
  5. If you win, then the other team has to drink what remains. Be sure they are drinking something you like, otherwise, you will be forced to finish what was started.
  6. Diagonal placement was allowed during our game. Be sure you discuss this with the other team in advance lest they get upset at you and accuse you of cheating…even though that’s how you’ve always played and had never heard that you weren’t allowed to. Whatever, this is a drinking game. Everyone is a winner drunk.

My Purse...

Thursday, November 10, 2011

My friend Dianthe recently wrote a post highlighting her purse and changing it out for the new season. In it, she asks what is in our purse. Well, first of all, I wanted to highlight my purse right now:


I left the paper clip in there for size reference. For those of you who know me, this is quite a feat for me to shrink down to this size of a bag on a daily basis. Of course, I'm maintaining some level of "me" because this is a Coach. In my former life (before kids, and yes, even before my beloved), I set money aside every paycheck solely devoted to the purchase of shoes and handbags. You would think that I would have a closet gloriously filled with both, but alas, I have a few remnants of that time, 3 are my Coach bags, 2 Dooney & Bourke bags, 2 Prada bags, and a few evening clutches. I won't even get into the shoes!

This bag was gifted to me by one of my dear friends, Danika (gracias hermana!). I was so excited to receive it because this meant that I wasn't going to have to constantly switch bags, forgetting things in the shuffle. In it I have:

  • 1 pen refill that acts as a skinny pen
  • 83 cents in change
  • a couple of receipts
  • rewards cards to Buzz Brews, Three Dog Bakery Treat of the Month, Miyoshi & Red Mango
  • $10 cash (shocker! I usually only carry $5)
  • tiny lip gloss sample from Avon
  • 2 band-aids
  • security access card for work
  • two wallets...one for cards and the other for the important cards. I made the one on the left with some black and white oilcloth I picked up years ago from City Craft using a Valori Wells Sewing Card.

Actually, I need to highlight the one on the left. It took me about 15 minutes total to whip up that little guy. The intention of it was for the fabrics to be opposite, but I didn't quite "get" the cards instructions and had them backwards. This wasn't anything new. Also, the insides of the pockets are a little zig-zagged. Another classic Bianca mistake that actually gives special flair to it. The diagonals work really well for me. Before I had my black Coach bag, this little wallet would roam to all sorts of bags with me. I have the order of the cards memorized! I'm thinking I may have to make another soon, though because the striped fabric is definitely wearing thin.

There you have it. My tiny bag!

My weekend go-to handbags that double as diaper bags will almost always have the following: wallet, a pen, sunglasses, cloth diaper, wipes, travel kleenex, pacifier, note pad, extra pens for Mari to draw or write with, a needle & thread, reusable waterbottle, reusable grocery bag, lip gloss, perfume roller, hair tie, coupons for various places to dine out, breath mints and/or gum, an energy bar, loose change, earrings or necklaces, post-it tabs, anti-bacteria soap, and an emergency straw (what, you don't have an emergency straw?).

Product Review: Beanies by Stacie + a Giveaway!

Wednesday, October 26, 2011

 
First of all, I just want to point out that I happened upon Beanies by Stacie through a local Mom's board. I'd always admired the work, but it wasn't until I was barely pregnant with Tesla that I finally ordered something. I ordered a cocoon from her and just said, surprise me when I told her the colors. I might have mentioned I wanted something pastel and organic feeling. This is what she came up with:


Then, she had her annual Christmas in July sale, so I jumped on that deal! I ordered hats for myself and my girls. Not only that, but I requested some slippers for all of us, too! She complied and boy howdy do I love them!!!


Not only that, but Tesla seems to love her hat too!

IMAG1250

I know some of you have Christmas gifts on the brain. Well, I would highly recommend you check her out. She has quite a few ready to ship items available, too! She's super quick, the quality is unparalleled, and she's just awesome! 

Now for a giveaway! I'm feeling the love that you all have been giving me for my mom. Thank you for those warm virtual hugs!! I would like to return the warmth! One lucky comment will receive a pair of slippers handmade by Beanies by Stacie courtesy of Hello Bianca! (yeah, that's me and I just totally referred to myself in the 3rd person, ha ha!) Here's how you can win:
  1. Go fan her on Facebook and tell her I sent you! Leave me a comment saying you did! 
  2. Leave me a comment telling me why you need your very own pair of slippers and what colors you would choose.
  3. Share this giveaway with a friend on twitter, facebook, through a blog, or even a copy and paste. Leave a comment telling me you did.
All comments must be made on my main blog page: www.hellobianca.com This contest will end in one week on November 2nd. Good luck!

**This review and giveaway are totally my own out of the goodness of my heart because I wanted to share an awesome product. I was not approached by Beanies by Stacie to do a review, nor the giveaway. All opinions expressed are my own.**

Tutorial: Childs Apron...The Belladyn Apron

Monday, October 10, 2011

This is a loose tutorial for an apron that fits size 3T-5T.

< 1 yard of fabric
thread
36" of at least 1" ribbon (4 strips of 9 inches)

IMAG1200


BOTTOM
Then, I cut out a 14 inch piece of fabric. I hemmed 3 sides of the edges. 1/4" hem folded in twice. The other side I gathered together. If you need help with gathering, check out this link. If you are feeling sassy, I would highly recommend you buy a ruffler foot. I used one for about two months and became addicted. I need to get one for my machine! Set your bottom aside.


TOP
I took one of my daughter's tops, folded it in half and came up with the basis of the top of the apron. It is about 12 inches by 10 inches. You will cut two of these pieces.

What I did was cut a 12 inch piece of fabric, then spread it out, folded at 9 inches and cut leaving that fold intact. The folded another 9 inches and cut at that fold. This left me with enough leftover fabric that if I wanted to make pockets, I could have.

Match up with the two right sides facing each other. before you pin, add your ribbon to the edges. (refer to my graphic for placement.

Sew on 3 sides, then turn around.

PUTTING TOGETHER
Match the bottom of the Top of the apron with the top of the Bottom piece. (it will look like the top is upside down. Pin along the edge and be sure that you pin it so your gathering seam will not be visible. Sew across the edge. For added security, I sewed along that edge as well. If you had a server, it would finish it off for you, but I don't have one, so I made do.

**tip: Be sure you don't sew over the ribbon!

FINISHING 
Next, top stitch all the way around to be sure it gives it a more professional look. Also, when using grograin, you must either burn the cut edges with a lighter or use some fray check.

Iron out the wrinkles and pay special attention to the side where you sewed your parts together. If you iron it properly, your unfinished edge will be concealed. I added a couple of homemade flowers and a fancy button at the center to one side. I think it gave it a bit more flair.
Now sit back and enjoy a glass of vino because you just made the awesome Belladyn apron! Woot Woot!

I plan to make another soon. Would you all like more pics in progress? How about a downloadable PDF of the top "pattern" piece I made?  These would make a great gift for tiny hostesses for Thanksgiving/Christmas! The two I made just happened to be for a birthday party. Nothing like handmade gifts, right? I think these aprons finally put me over the edge to purchase my own labels, though! EEEK! So exciting!


Halloween Ideas

Tuesday, September 27, 2011

Normally, I like to have the Halloween costume picked out and pretty much ready to go at the end of September, but I haven't really been focused on that. Until my friend posted this link to LilSugar.com's article about Best Costumes for Baby's First Halloween. If you look closely, you will see our Sugarbaby! They featured this photo taken by Pumpkin Pie Photography and she's wearing the outfit from Sweet Love Creates.

All of that awesome cuteness, what could I possibly dress her in for Halloween? Maybe a banana?

IMAG1147


Really, I would like to do something fun for both gals, but it looks like Mari is insistent on being a princess. I'm gonna try to see if she'll dress up in a pink dress. If so, she can be Glinda the good Witch, Tesla can be Dorothy or a Munchkin, and Guapo and be Elphaba...or Toto. :D

Or why does it even have to be a theme? I caved and bought some lace rompers for the girls' dress-up. I think I could figure out a way to add some peacock feathers or feathers in general. What do you think? Or we could go a completely different direction and take advantage of some nifty outfits on Kohls.com. Using Kohl's cash and their discounts makes their costumes quite affordable. I like the idea of all of us being super-heroes. We could also be Star Wars characters. I think Tesla would make an adorable Yoda (they don't have it)! Of course, Mari could be Princess Vader (as she frequently likes to dress up). Or I think my favorite would be a family of rag dolls. Raggedy Ann & Andy family. Cute, huh? 

Best laid plans, though. Halloween will soon sneak up on us and I'll probably end up being a banana. 

IMAG1146

How about you all? What are your ideas?

Learn How to Make Your Own Crochet Coffee Sleeve (Coffee Cozy)

Tuesday, September 20, 2011


Coffee sweater? What's that? Well, you coffee drinkers...let me rephrase...you to-go coffee drinkers who buy your coffee from shops instead of making it at home, are often given a warm cup of heaven in a paper cup. If you are lucky, immediately next to the piping hot goodness are cardboard sleeves to keep your hands from burning. After all, the coffee you get is pretty hot. For this very reason, I elect to order my drinks at a cool-er 140 degrees.
...but I still use the cardboard sleeve. 

I must go though two of these a day at work and once a week for when I go out, so that's about 10-12, but I've known that I've used about 15 in a week!!! That's too much waste! Enter the indie coffee shop. A few weeks ago, I treated myself to a wonderful bit of goodness to a local shop (hi Crooked Tree! seriously, if you've not tried it, go there and feel awesome and artistic and welcomed! good stuff). They frequently have stuff on display that you can purchase. Stuff like hand woven/dyed scarves from Africa, coffee, cookies, muffins, and coffee cozys! This time, the sleeve was actually a beautifully cable-knitted sweater. I loved it. And while I was ready to whip out some of my discretionary income to buy one, I made a mental note to make one. Because I have yarn at home that needs to be turned into something. (Sidenote, I've been avoiding purchasing this awesome felt cozy, but I don't know how much longer I'll hold out.)

I searched online for a coffee sleeve pattern, but all I came up with was for knitting or sewing. I didn't want to sew one, I really wanted that sweater effect. When we had rain the other evening (hooray for rain!!!!!!), I sat down to make a Christmas gift. I was going to make a sweater. I was doing the single chain when I realized that I didn't have enough of this particular yarn to make a full sweater. Since I bought it last year, I knew that the lot wouldn't match exactly. Instead, I thought I'd whip up a cozy. I don't know how crochet patterns work, but I know how to count. ha ha! Here's what I did:

  • 9 or 10mm gauge needle
  • Jiffy yarn (not sure if it was thick & quick or just regular)
  • 18-20 single chains (with a couple of extra to do the double crochet turn)
  • double crochet 4 rows
  • crochet the rectangle together

crochet coffee cozy!


I've clearly used it multiple times, but I just have to remember to bring my coffee sweater! :)

This is a nifty crochet reference page where I found this video.

Infant/Toddler Pants from a Sweater

Wednesday, June 1, 2011

Since we are doing cloth diapers, at night, I like to put an outer Thirsties cover on Tesla or if it is cooler, then a pair of longies (knit, fleece, or wool pants to help soak any leaks).

Sidenote: Have you ever wondered what was in a disposable diaper? Ignorance is bliss, I tell ya.

Remember when I had my sewing party? Well, one of the gals made a nifty bag out of a thermal-like sweater-shirt. Because the sleeves remained and I thought they were cute enough, I wanted to try to make a pair of longies for Tesla. I happened upon a tutorial. I figured you could make this a tutorial for pants for a toddler as well, provided the arm sleeves were long enough. Anyway, here are my photos during the process:

Start with your two sleeves:

IMAG0868

Next, from an existing pair of pants, measure where the bottom of the crotch will be and mark it with a pin.

IMAG0869 IMAG0870

Cut at the seam of the arm down to the pin. Cut from the top of the sleeve because the bottom of your sleeve will be the "natural" bottom of the pants. Hooray for not having to do hems!

Turn one sleeve inside out and put the normal sleeve inside of the inside out sleeve. Fabrics should be "kissing." Line them up.

IMAG0871

Sew together. I used a zig-zag stitch.

IMAG0873

Measure the waist. Leave room for the size of your elastic plus a little extra. Mine ended up being low rise, so I would've have cut three inches higher than I guessed. Fold down and pin to make the waist. Here is where it is important to measure the hips accurately for a cloth diapered bum! ;)

IMAG0874

Sew the waist and be sure to leave an opening to put in your elastic. Again, I used a zig-zag stitch since it wasn't fleece (and I don’t have a serger).

IMAG0875

Ta-da! Knit longies for my cloth diapered baby. The Sugarbaby looked so stylish with her fancy new pants.

IMAG0876

Such cute teeny-tiny legs! Can’t wait to rummage through my giveaway stash to see if there are more cute sweaters I can repurpose for her.

Singer Sew Easy House Party

Saturday, May 28, 2011

I know this post is long overdue, sorry! Anyway, I wanted to start off by saying thanks to all of my friends and family who were able to attend the party. It was a huge success (well, to me anyway) and I felt confident that everyone left having learned something new about sewing. A few even left feeling more comfortable in their own abilities and stated that they were going to attempt more projects on their own.
Before the party, I held a Skype session, had a one-on-one session, and recorded a few YouTube videos too. Here is the first one:
Singer Sew Easy House Party Swag
On Mother’s Day, 9 lovely ladies came to my house and crammed in my dining room to sew. I suggested that they bring their own machines if they wanted to, but I would be featuring the new Singer Confidence Stylist. Here’s another YouTube video I recorded talking about the Machine.
Singer Confidence Stylist Machine
The main project was to upcycle or repurpose an old favorite t-shirt into a regular tote bag. First of all, I have to say that I snapped photos of the entire process and you know…I committed photographer sin by not verifying that I had a memory card in the camera! Thank goodness my husband was there for a bit to snap some photos. I will post a separate blog how to do the project, but for now we’ll just focus on the party. ha ha!
IMG_4958
IMG_4965IMG_4966IMG_4969IMG_4970
IMG_4950
I served light refreshments, including Orangina, Figi water, Izze, and Mexican Coke as the drinks and some taquitos and thumbprint cookies for us to munch on for added sugar rush. Additionally, we had red wine and prosecco in case someone need some liquid courage to be crafty! ha ha!
As the party host, I received the opportunity to purchase the machine for 20% off the listed price. Regular retail price is $499. Jo-Ann had it on sale for $299, so 20% off of that put it at $265 including tax. PLUS, I also got a nifty black travel bag to put the sewing machine in!! I’m a sucker for a deal. While I did not purchase the machine for myself, my mother-in-law took advantage of the opportunity! Lucky for me, I get to enjoy it for the rest of the summer until it goes home with her at the end of her stay!

CHEERS…

  • I really liked all of the party swag from this House Party. Most of the coupons were great.
  • The included project was ok and easy to follow.
  • The patterns from Simplicity were awesome and I can’t wait to try making a skirt!
  • I loved the included thread from Singer!
  • The Burdastyle measuring cards sure come in handy when shopping for patterns for the girls.

JEERS…

  • The 50% off of Martha Stewart crafts coupons were not so great because it had to be used towards items that weren’t on sale. Every time I’ve gone, all Martha Stewart craft items have been 20-40% off, so I can’t use it.
  • The included fabric for the roll-up project was not so great. I know it is hard to please everyone, but these just weren’t colors I would have chosen.
  • The extra advertisements for the ironing accessories were unnecessary.
  • The bajillion flyers for summer programs were also overkill, in my opinion.
  • I did not like having so much extra wasted paper. I just tossed it in the recycle bin.
  • The sparkly Martha Stewart decoration looked beautiful in the photo. When I opened it, there was glitter EVERYWHERE!! Talk about a mess. I’m still finding glitter and that’s because I didn’t even consider hanging it. awful!
As far as the machine goes, though! I love it. If I hadn't purchased a machine a year ago, I totally could see myself owning this one. 

Peach Empanadas

Friday, May 27, 2011

Last week, the need for fresh peaches overwhelmed me. I think it has something to do with the weather getting warmer. Back when I was a kiddo (here we go with another memory), mom would indulge in all sorts of fresh fruits. These include peaches, apricots, and watermelon. I don't particularly like watermelon. When she was visiting last week, she, Don, and Mari tore into the watermelon while I sipped on my sweet tea. Then the urge hit...I wanted peaches! Peach cobbler, peach empanada, peach tea, millions of peaches, peaches for me!

I went to Love & War (review to come) to satisfy the peach cobbler craving. It only made me wish I would've made some myself. Instead, I went to the Google to find a peach empanada recipe and happened upon bread & honey's blog. {loveit}

It was quite fun! Here's the recipe as posted from Alice's bread & honey (thanks Alice):

Peach Empanadas

Ingredients:

for the dough...
1 1/2 cups flour
1 tablespoon sugar
1/2 cup (1 stick) butter, diced
4 tablespoons iced water

for the filling...
1 tablespoon cornstarch
1/4 cup granulated sugar
1/8 teaspoon ground nutmeg
1/8 teaspoon ground cinnamon
1/8 teaspoon vanilla extract
Pinch of salt
2-3 large ripe peaches, pitted and coarsely chopped (seriously, chop them good or even use a food processor)

sugar for sprinkling

Directions:

Lightly butter and flour a cookie sheet.

To make the dough: Combine butter with flour, sugar and salt until coarsely mixed. Add enough water to form a dough. Chill for at least 20 minutes. Roll out on floured board. Cut dough into circles as small as you like but no larger than 9 inches in diameter. 
To make filling: In a large bowl, combine sugar, cornstarch, spices and pinch of salt; add peaches and vanilla; stir well. 

Preheat oven to 450 degrees F.
Spoon peach filling on one half of the circle, leaving an ample border to fold over and seal the other half. Moisten half of the circle on the fruit side with ice water. Fold dough over fruit filling and press edges together with the tines of a fork. You can also spoon filling into the center of a circle, moisten the edges, and put another circle of dough on top and seal. Chill for at least 10 minutes. Brush tops of empanadas lightly with ice water and sprinkle with sugar. With a sharp knife, pierce vent holes in each one. Place on prepared baking sheet. Bake 5 minutes, reduce heat to 350 degrees, and continue to bake for another 10 minutes until the pies are golden. Let them cool and serve warm or cold plain or with ice cream.


**note: I added a pinch of ginger to my spices and the peaches. I probably would've taken the skins off the peaches and chopped finer. I also would've cooked on parchment paper because I prefer to not have to clean up as much.**

Caterpillars & Ladybugs

Tuesday, April 19, 2011

Have you ever seen caterpillars race? We did! The one on the right actually caught up with the one on the left. We weren't really sure where they were racing, but they were both in a hurry!
IMAG0762
When we went outside to load our mailbox, we save all of these caterpillars crawling around on the sidewalk and the exterior walls in the doorway. There were actually 8 total. I've never seen so many caterpillars at once, it was quite remarkable, actually. Mari was ecstatic, but was initially freaked out by them. I gathered a couple to put in a jar so she wouldn't be afraid. (We released them 5 minutes later.)

The one on the left remained asleep and Mari proclaimed it dead. Upon release, it continued to be still. She was sad and then it wiggled slightly and went off on its merry way. She was beyond happy. I took that opportunity to talk about Easter and Christ's resurrection. Not really sure if she "got it." But just because she may not completely understand things doesn't mean I shouldn't talk about them and try to plant that seed early.
IMAG0761

And speaking of nature, isn't this quilt beautiful?
IMAG0764.jpg

My MIL made it for Tesla. She's so talented!! I sent her a quilt that I liked online and it cost quite a bit. Well, when we opened the box and saw this, my breath was taken away. This is gorgeous and she will love it for years to come. We have incorporated ladybugs into the nursery. We haven't finished her room yet, but I hope to get a better handle on it this summer. She will also get the Cloud B Twilight ladybug to use as a nightlight. Mari loves her turtle so much, so we were sold on the ladybug!

How are you all enjoying nature?

The Fence, The Fence!!

Tuesday, March 29, 2011

This past summer, Don started to put up our fence. In this video, I show a bit of our backyard. Don has recently started blogging, and wrote about the fence install in a bit more detail. Here is a video I captured of our backyard renovation. After watching this, I realized that I need to take a final video of our backyard update and plant my tomato plants (especially since our dove has made her return)! Anyway, here is a before video of our backyard (sorry for the wind):


Check out Don's blog over at The Competent Dad to read all about it. While you're there, you should become a follower! :D

Boutique Baby Gifts

Sunday, February 27, 2011

Not only am I expecting a little one very soon, but some of my friends are also expecting their own little bundles of joy. When Mari was born, one of the most plush gifts we received was this gorgeous baby pink and chocolate flannel paisley stroller blanket with satin binding and a pink satin back. It was beautiful and soft and luxurious. I thought, our Sugarbean is a very lucky girl indeed! I wanted to keep the blanket for myself. ha ha! At the next opportunity to give a gift for a first time mom, I wanted to see about giving a similar blanket. You can imagine my surprise when I searched online and found them priced anywhere from $35-$60 dollars. *OUCH* Similarly, matching burp cloths were $30 for a set of 3. I have seen a set of three go for as little as $15, but you would still have to pay $3 shipping. I like to spend anywhere between $30 and $50 for a baby gift. That falls in line with my budget, unless of course I have 4 baby showers in a month and then, well, I'd be stretched a bit too thin. (Sidenote: What about you all? How much do you spend on a gift for a good friend? How about a gift for a co-worker?)

I took Mari's blanket and inspected it. I tried reverse engineering it as best as I could, but I just kept it on the back burner for a bit. Instead, I opted to spend the money for things on their registry and other small things that I have found helpful to have (mylicon, travel wipes, extra baby nail clippers, saline drops).

Next week, I'm hosting a baby shower for a dear friend. This will be her first child and the gender is going to be a surprise. I had some MONSTER coupons for Jo-Ann's for their President's day sale and they had baby flannel on sale too. (the coupon could be used for your sale items too!) I had planned on going to see if I could score some cute flannel to make Tesla some burp cloths and maybe a stroller blanket. I was inspired by this post. I know she uses knit, but I like how flannel is too. Anyway, while there, I fell in love with two different turquoise and brown prints. I added the numbers in my head and figured I would still be able to gift her something off of her registry AND handmake a gift.

I bought a yard of one flannel print, half a yard of another print, a yard of minky fabric, and 1 package of satin blanket binding. I spent less than $20. I would have spent closer to $15, but I gave away my 50% off any regular item coupon to a stranger thinking that everything I had was on sale. It's ok because I saved that stranger $16 dollars and it further warmed my heart when I saw his teenage daughter walk up and give him a hug. Yeah buddy, you need all the savings you can get! I digress. I must say, I have made burp cloths in the past and embroidered them too. Plain cloth diapers seem to always be in my stash. (I usually buy the 12 pack for around $10-$12.) Lucky for me, the house was quiet on the Sunday afternoon because everyone was napping. I was feeling creative, so I pushed off my laundry to do later on in the evening.

First up, the baby blanket:
You can see the chocolate satin binding, the white minky fabric, and the turquoise and brown flannel print. I learned that I need help with mitering the corners, but other than that, it turned out very nice! The blanket cost me about $17. Again, it would have been less expensive, but the I didn't use the coupon on the binding, which cost $7 a package. It took me about an hour to make it. Knowing how much it cost explains why they cost so much, right?

Next up, the set of three burp cloths:
The one on the left is a plain white diaper with the flannel fabric border. The one in the middle has the white minky fabric back with the same flannel print on the front. The one on the far right has the flannel print running down the center. I really liked how all three of these came out! I used to extra brown ribbon to tie them together. Each burp cloth cost me about $1.25 to make. It took me between 30 and 45 minutes to make them.

I have a bit of extra minky fabric and flannel fabric remaining that I could probably make two more minky/flannel burp cloths and 1 flannel burp cloth.

For around $20 (a little more) and two hours, I was able to make boutique-like gifts that are one of a kind AND handmade. There you have it.

And now for the Mari in Wonderland with a Chance of Meatballs birthday recap

Monday, February 21, 2011

MariTURNS3-132

Yes, you read that correctly...that was the theme of the party this year. Here's the awesome invitation that I created on pingg.com:

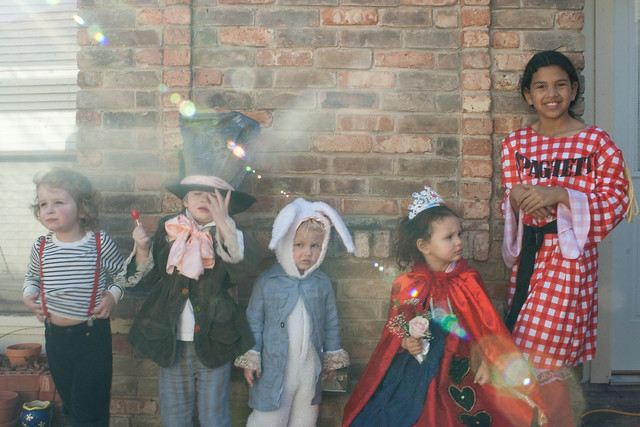
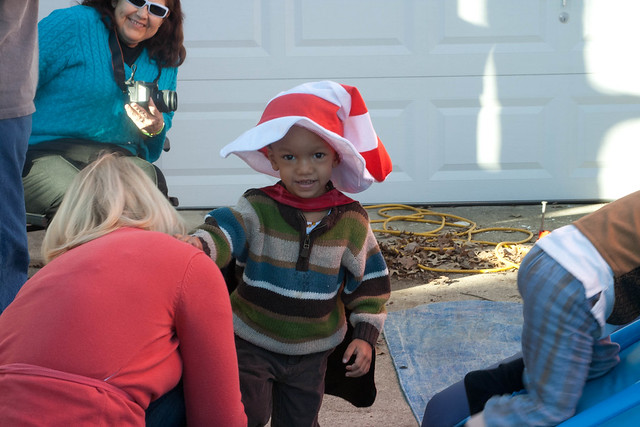
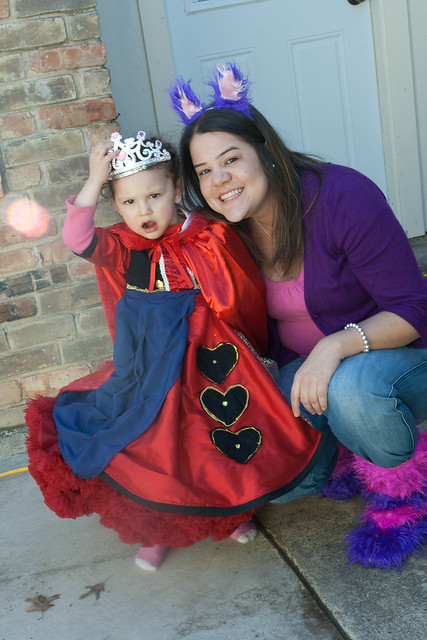
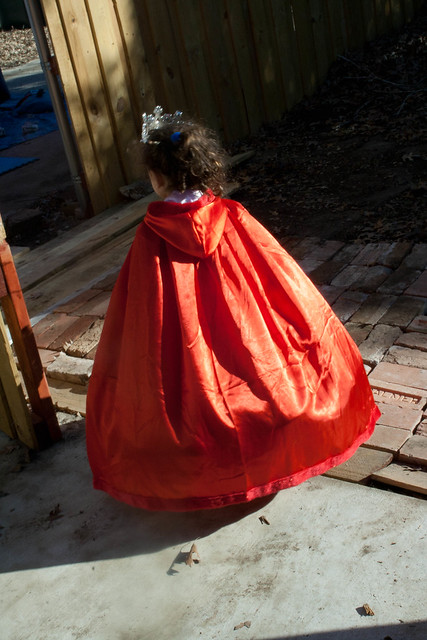
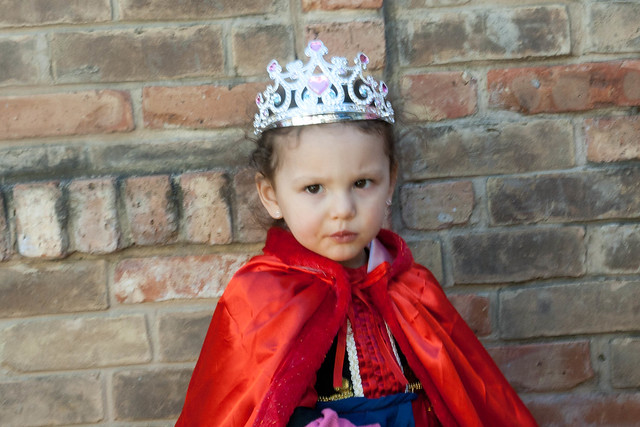
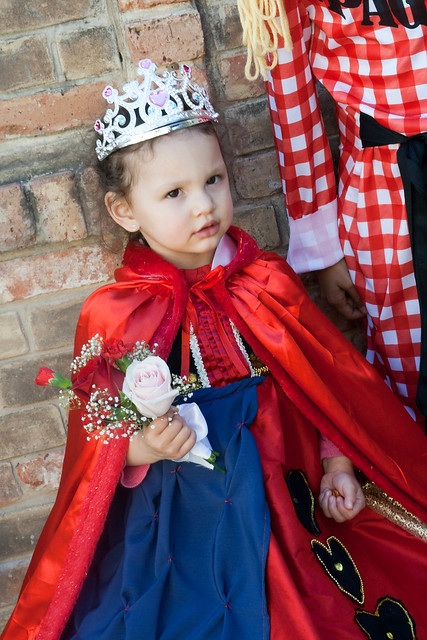
I know it wasn't really evoking the theme, but I just wanted kids to come dressed up using their best imaginations and if it went along with the theme, then awesome! Lucky for us, we had quite a few participants! Tweedle-dee, the Mad Hatter, the White Rabbit, the Red Queen, and Spaghetti!
MariTURNS3-8

Sharing candy:
MariTURNS3-119

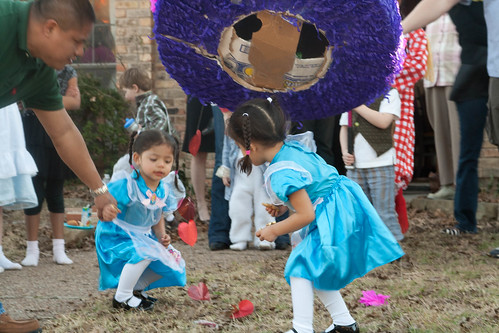
Alices collecting candy:
MariTURNS3-85

MariTURNS3-36

With her godmother from San Diego, the Cheshire Cat.
MariTURNS3-26


With her Nina, the spaghetti.

Spaghetti & Meatball

Look, it's a very pregnant me! I'm Absolem the blue butterfly that was once the snarky caterpillar. Why yes, that's a Mexican Coke in my hand. I kept losing it and I only had half of it. *sigh* BTW, do you like that awesome pink flamingo? I do!
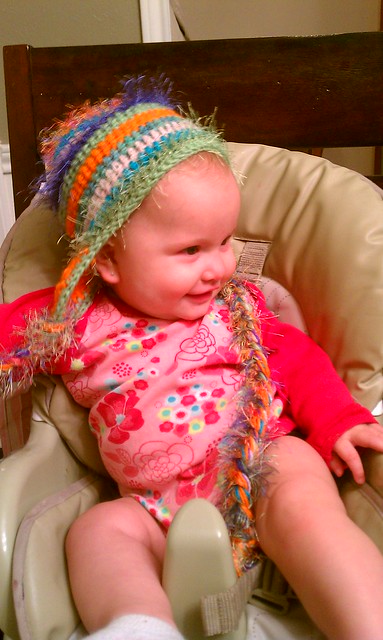
Now for some details from the day. First off, here she is in her costume, which she wore for a whoppin' 20 minutes. Woot! (sarcasm font)
MariTURNS3-1

MariTURNS3-18

MariTURNS3-15

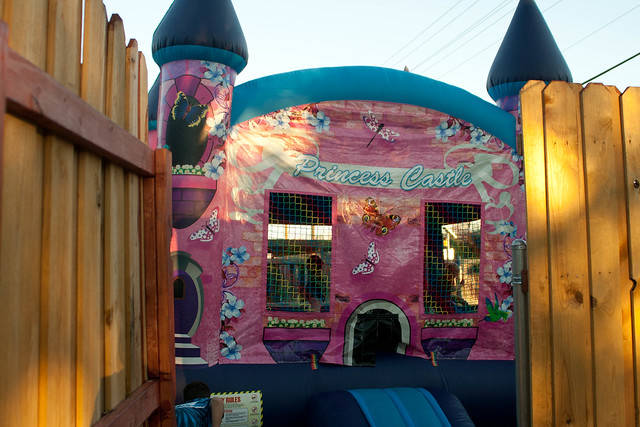
First off, a must at a Mari-birthday is a bounce house. This year, since she is quite girly, I opted for the princess bounce house. Aside from the pink castle facade on the outside, the inside was quite fun and even had a basketball hoop! All of the kiddos seemed to really enjoy it. The Sugarbean must've bounced for 5+ hours!
MariTURNS3-146
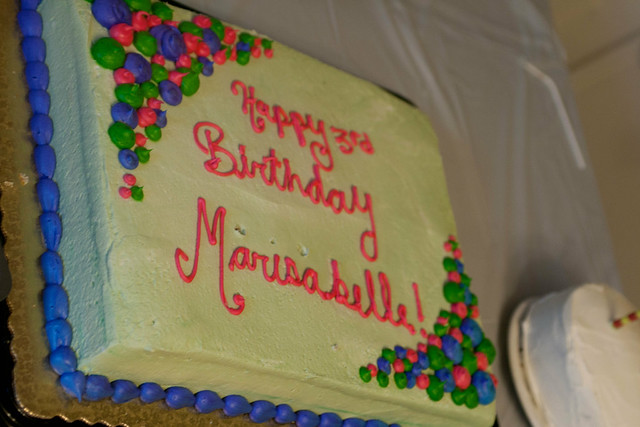
Remember the epic cake fail? Well, my mom salvaged the top with some excellent icing skills that I clearly have yet to inherit.

MariTURNS3-123

Because I wasn't sure if there was going to be enough cake with the cupcakes, I opted to buy another cake. Since I hadn't ordered one, I had no choice but to buy a full sheet. We still had 2/3rds remaining. Ooops!
MariTURNS3-122

Here is the room layout. We use our dining room to keep all of the food and decorations. The weather more than cooperated with us, so most of the party would be enjoyed outdoors, here, or in the living room where we were showing Tim Burton's Alice.

I made some specialty drinks with "drink me" on them. These are the juice boxes and water bottles.
We also had some adult beverages in the fun fridge.
Not shown are the Dublin Dr. Peppers, Mexican Cokes, and two flavors of Izze sodas.

Remember I mentioned cupcakes? Well, I made a cupcake tower and positioned them on top. The cupcake toppers said "Eat Me." They were assorted cupcakes from Society Bakery. I scored an awesome Groupon which made these cupcakes significantly less expensive than they would have been.

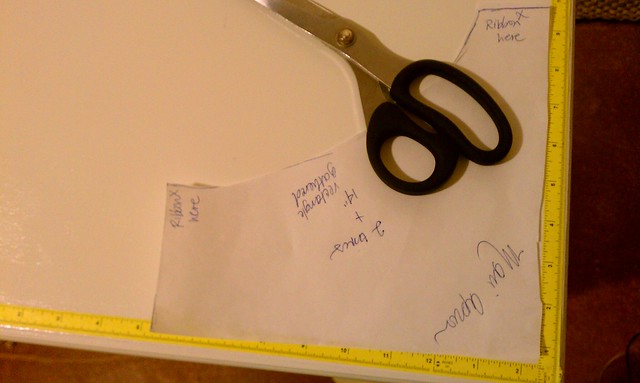
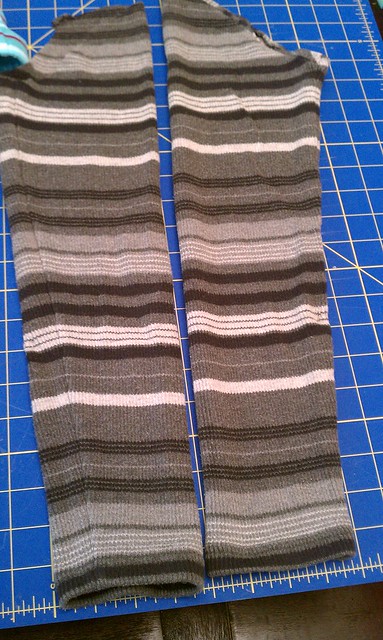
And what party is complete without favors? I didn't want the kiddos to be sent home empty handed, but I also didn't want to fill their homes with awesome trash either. Granted, these may very well have ended up in the trash, but I know they had a lot of fun with them at the party. They are ribbon wands (turquoise and white with a flower, and brown and green). It warmed my heart to see some of the little ones not being gender specific to the color of the ribbon wands. They just wanted something to shake! Also, in the plastic baggies are crayons that I had melted down from other crayons. They came out, um, interesting, but they work really well!
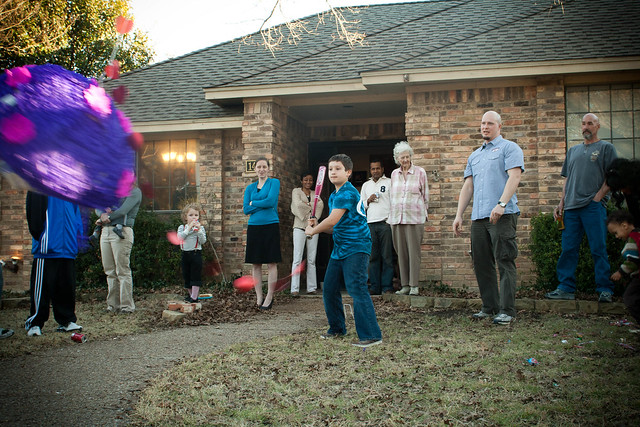
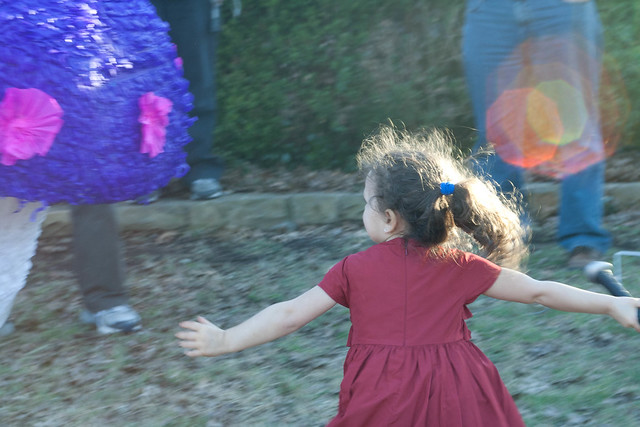
The pinata!
There's a story for this pinata. It traveled all the way to our home from Tijuana, Mexico. Mari's godmother and one of my besties commissioned a guy to make it per my request. Originally I told her 17 inches. I figured that would be a good travel size. Well, I guess the guy really likes what he does, because this thing was easily 2 feet tall by 2.5 feet in diameter. You may be asking yourself how in the world did she get it on the plane? She cut it in three parts and boxed up the top portion and filled it with some of her clothes to use the box as one of her check-in items. AMAZING!! We used a lot of tape to put it back together, but it was so awesome!

Then for the food, we had hot dogs, sliders (OMG...to die for sliders, WTG babe!), chips, infinite amount of cake (ha ha), cookies, chocolate peanut butter balls, candy
I didn't get any photos of the activities available for the kids, except the bounce house and pinata. But, we did have croquet available (which ended up turning into glow-in-the-dark midnight drinking croquet, long after the party) and print outs of white roses to be colored red...or any other color. This shot, is one of my favorite action shots of the pinata.
MariTURNS3-110
Here's one of Mari revving up for a hit. She actually busted the base right off.
MariTURNS3-63

My friend Hayley caught me shooting the pinata action. Yes, I had a bit of a difficult time getting back up to standing. ;)
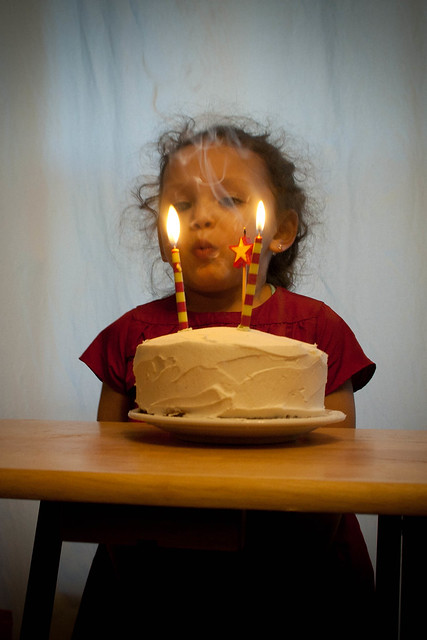
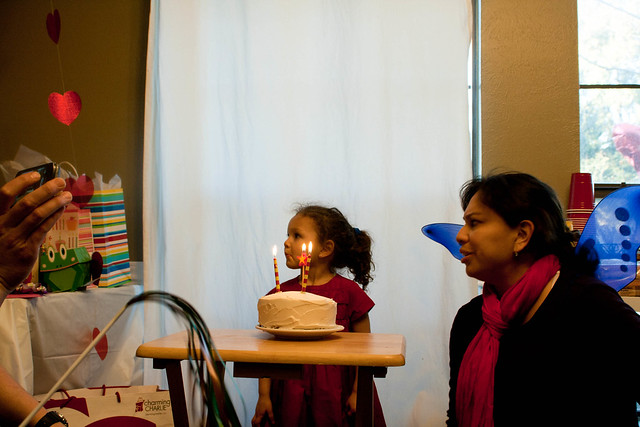
After the pinata, we sang to her, and this year she didn't cry. She actually seemed to enjoy it! Guapo even jumped in on the singing action.
MariTURNS3-126

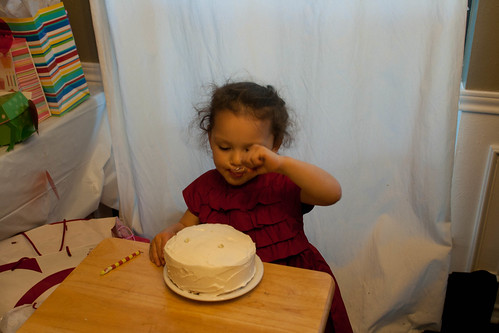
Personal upside down pineapple cake (which I was later complimented on my sloppy cake by the brave who ate it. despite the ugliness, it really was quite delicious!)
MariTURNS3-140
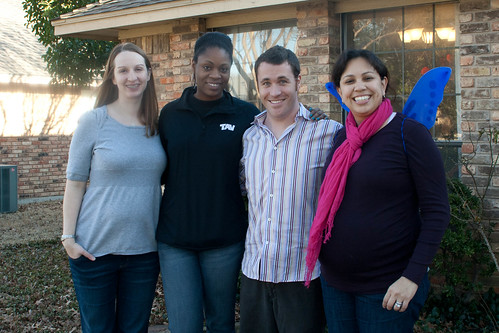
We were happily overwhelmed by the outpouring of love and friendship with everyone's presence. We are truly blessed by all of the special people in our lives. I'm especially grateful to family who traveled a great deal to get to us. Also, I'm grateful for my best friends Lindsey, Ada, and Michael. When I was younger, it was difficult to imagine I'd get to the point where we would be grown and we could celebrate these milestones of the next generation, but here we are all together. (with two more on the way inside both mine and Lindsey's bellies)

MariTURNS3-47

Happy 3rd Birthday Sugarbean! Mommy & Daddy (and so many friends and family too!) love you very much! I know you'll remember it because you are still talking about it. :D

Let me know if you want more information about the details of the party or my planning process in general. I'd be happy to write more information about those in a separate post.
CopyRight © | Theme Designed By Hello Manhattan