
< 1 yard of fabric
thread
36" of at least 1" ribbon (4 strips of 9 inches)
BOTTOM
Then, I cut out a 14 inch piece of fabric. I hemmed 3 sides of the edges. 1/4" hem folded in twice. The other side I gathered together. If you need help with gathering, check out this link. If you are feeling sassy, I would highly recommend you buy a ruffler foot. I used one for about two months and became addicted. I need to get one for my machine! Set your bottom aside.
TOP
I took one of my daughter's tops, folded it in half and came up with the basis of the top of the apron. It is about 12 inches by 10 inches. You will cut two of these pieces.
What I did was cut a 12 inch piece of fabric, then spread it out, folded at 9 inches and cut leaving that fold intact. The folded another 9 inches and cut at that fold. This left me with enough leftover fabric that if I wanted to make pockets, I could have.
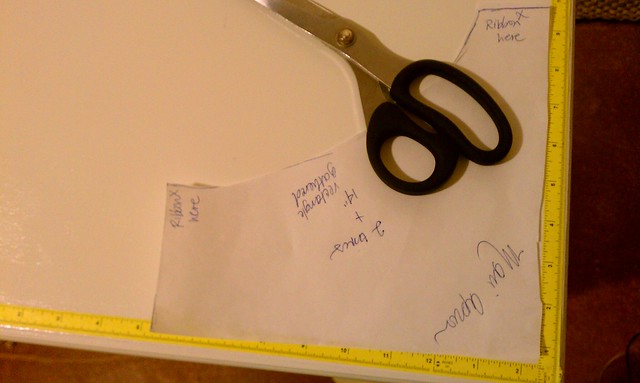
Match up with the two right sides facing each other. before you pin, add your ribbon to the edges. (refer to my graphic for placement.
Sew on 3 sides, then turn around.
PUTTING TOGETHER
Match the bottom of the Top of the apron with the top of the Bottom piece. (it will look like the top is upside down. Pin along the edge and be sure that you pin it so your gathering seam will not be visible. Sew across the edge. For added security, I sewed along that edge as well. If you had a server, it would finish it off for you, but I don't have one, so I made do.
**tip: Be sure you don't sew over the ribbon!
FINISHING
Next, top stitch all the way around to be sure it gives it a more professional look. Also, when using grograin, you must either burn the cut edges with a lighter or use some fray check.
Iron out the wrinkles and pay special attention to the side where you sewed your parts together. If you iron it properly, your unfinished edge will be concealed. I added a couple of homemade flowers and a fancy button at the center to one side. I think it gave it a bit more flair.

I plan to make another soon. Would you all like more pics in progress? How about a downloadable PDF of the top "pattern" piece I made? These would make a great gift for tiny hostesses for Thanksgiving/Christmas! The two I made just happened to be for a birthday party. Nothing like handmade gifts, right? I think these aprons finally put me over the edge to purchase my own labels, though! EEEK! So exciting!
No comments:
Post a Comment